If you’ve ever stood beside a heavy-duty truck or a transit bus idling at a depot, chances are you’ve glanced at the brake chambers hanging beneath the chassis and spotted the small, cylindrical Automatic Slack Adjuster (ASA) bolted right next to them. For anyone in the business of keeping commercial vehicles on the road and stopping safely, these parts aren’t just afterthoughts—they’re the unsung heroes of brake performance, tire wear, and overall fleet safety. As someone who’s spent the last decade supplying ASAs to fleets, repair shops, and truck OEMs across North America, I’ve lost count of how many times a simple alignment question has tripped up even the most experienced technicians. A misaligned ASA doesn’t just cause minor inefficiencies; it can lead to premature brake failure, uneven tire wear, and even costly regulatory fines. That’s why today, I want to break down the critical alignment requirements for ASAs, based on real-world installation data, hands-on troubleshooting, and the standards we all rely on to keep fleets compliant. Automatic Slack Adjuster
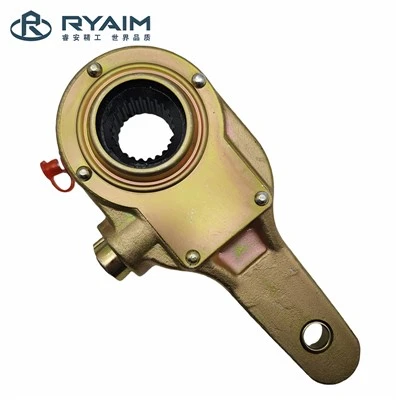
First, let’s ground ourselves in what an ASA does, because its alignment needs are directly tied to its core function. Unlike manual slack adjusters, which require technicians to physically crank a lever to adjust brake shoe clearance, automatic slack adjusters use internal gears and a sensing mechanism to compensate for the natural wear of brake shoes, linings, and related components over time. Its job is to maintain the optimal gap—usually between 0.020 and 0.050 inches—between the brake shoe and the drum when the brakes are released. If the ASA is misaligned from the start, it can’t do its job correctly, no matter how well it’s built.
The first non-negotiable alignment requirement comes down to the angle of the ASA relative to the brake camshaft. Let me explain: The ASA connects to the brake chamber pushrod on one end and to the brake camshaft on the other. When you press the brake pedal, air pressure pushes the chamber pushrod outward, which in turn rotates the camshaft. The camshaft opens the brake shoes, creating friction against the drum to slow or stop the vehicle. For this motion to be smooth and consistent, the centerline of the ASA’s drive arm has to be perfectly aligned with the centerline of the brake camshaft. Too much deviation here, and you get what technicians call “binding”—the ASA doesn’t rotate freely as the pushrod moves, so it can’t adjust slack properly over time.
I’ve seen this mistake far too many times on new installations. A technician will bolt the ASA to the camshaft and chamber without double-checking the angle, resulting in a misalignment of 15 degrees or more. In the short term, the brakes might work, but within a few months, the ASA will start to wear out prematurely. The internal gears will strip, or the sensing pin will get jammed, and you’ll be looking at an unplanned breakdown on a highway, not at a depot. The standard from the Commercial Vehicle Safety Alliance (CVSA) calls for this angle to be within plus or minus 2 degrees of the camshaft’s centerline. That might sound tight, but using a simple angle finder tool—something every good shop already has—makes this easy to check. At our facility, we include a free angle gauge with every ASA we supply for exactly this reason; it’s a small add-on that saves our customers hundreds of dollars in avoidable repairs.
Next, we have the pushrod alignment, which is just as critical, if not more so. The ASA’s input arm connects to the brake chamber pushrod via a clevis pin and a cotter pin. The pushrod itself has to be aligned along a straight line with the ASA’s input arm, no more than 1/8 inch of lateral deviation at the point where they connect. Why does this matter? Think of it like a door hinge: if you push a door at an angle, it binds in the frame instead of swinging open smoothly. The same logic applies here. If the pushrod is even slightly off-line, every time you apply the brakes, you’re putting uneven stress on the ASA’s housing and the camshaft bushing. Over thousands of brake applications, that stress adds up. We’ve had customers come to us with ASAs that failed at 30,000 miles, when the industry average for a heavy-duty ASA is 150,000 miles, just because their technicians skipped this check.
A common pitfall here is not accounting for the sag in the brake chamber mount. Most commercial vehicles have rubber-mounted brake chambers, which can flex slightly when the vehicle is loaded or when it hits a pothole. If you align the pushrod and ASA on an unloaded vehicle on a smooth lift, once you add a full load of cargo or let the vehicle sit on the ground, that rubber mount flexes, and the alignment is thrown off. That’s why our installation guidelines, which align with SAE J267 (the standard for ASA performance and installation), specify that alignment checks should be done with the vehicle at ride height, loaded to its maximum Gross Vehicle Weight Rating (GVWR), not just on an empty lift. It’s a small step, but it eliminates a huge source of misalignment that most technicians miss on their first try.
Then there’s the vertical alignment relative to the brake spider, the metal plate that holds the brake shoes and camshaft in place. The ASA has to sit parallel to the brake spider, not tilted forward or backward by more than 3 degrees. Tilting the ASA forward means that when the pushrod extends, it’s pulling the camshaft too far, creating excessive brake slack that the ASA can’t compensate for. Tilting it backward has the opposite effect: it’s restricting the pushrod’s travel, so the brake shoes stay pressed against the drum even when the brakes are released. That leads to “drag brakes,” which waste fuel, overheat linings, and can cause brake fade during long downhill runs. I remember one customer who called us in a panic because their fleet was getting 2 fewer miles per gallon after installing new ASAs. When we inspected their vehicles, every ASA was tilted backward by 7 degrees, causing constant brake drag. Fixing that alignment boosted their fuel efficiency back to normal within a week. It’s a simple fix that makes a huge difference.
We also have to talk about clearance alignment, which is often overlooked but just as important as the angular alignments I mentioned earlier. The ASA has to have at least 0.5 inches of clearance between its housing and any surrounding components: the frame, the fuel tank, the suspension parts, or even other brake system components. If the ASA is too close to another part of the vehicle, when it rotates during brake applications, it can rub against that component. Over time, that rubbing wears down the ASA’s housing, damages the gears, and causes it to lock up. I once heard a story from a fleet manager who had a dozen ASAs fail on a route through the Rocky Mountains. The root cause? The ASAs had been installed too close to the spring hangers, and during the rough mountain driving, the vibration and the rotation of the ASA caused it to grind against the hanger, stripping the internal gears. Adding a small spacer between the ASA and the frame solved the problem entirely.
One of the most common mistakes I see is installing the wrong size ASA for the vehicle’s brake chamber and camshaft. Each ASA is calibrated for a specific brake chamber size (most commonly 20, 24, or 30 square inches) and camshaft spline count. If you put a 20-square-inch ASA on a 24-square-inch brake chamber, the leverage ratio is off, which means the ASA can’t generate enough torque to rotate the camshaft correctly, leading to inconsistent slack adjustment. Similarly, using an ASA for a 10-spline camshaft on a 12-spline camshaft will throw off the alignment instantly, because the drive arm won’t seat properly, creating play and binding. At our company, we have a team of technical support specialists who help customers match the right ASA to their vehicle, and we provide a detailed spec sheet with every product that lists the required spline count, chamber size, and alignment tolerance. We’ve had customers come to us with misaligned ASAs that were the wrong size, and swapping for the correct part fixed their issues immediately.
Now, let’s talk about how to actually check these alignments step by step, because knowing the requirements is useless if you don’t know how to verify them. First, lift the vehicle to a height where the wheels are off the ground, and make sure it’s secured properly. Attach an angle finder to the brake camshaft, then align the ASA’s drive arm with the camshaft. Adjust the ASA’s position on the spline (if it’s adjustable) until the angle is within ±2 degrees. Next, check the pushrod alignment: use a straight edge to line up the center of the ASA’s input arm with the center of the brake chamber pushrod. Adjust the clevis pin position if needed to keep lateral deviation under 1/8 inch. Then, check the vertical alignment relative to the brake spider: place a level against the ASA’s housing and the brake spider. The bubble should be within ±3 degrees. Finally, check clearance all around the ASA, using a feeler gauge to make sure there’s at least 0.5 inches of space between the ASA and any other components.
It’s important to note that alignment isn’t a one-time step for new installations. ASAs can drift out of alignment over time due to wear, vibration, or minor adjustments from previous repairs. We recommend checking ASA alignment during every scheduled brake service, which for most fleets is every 20,000 to 30,000 miles. A quick alignment check can catch issues before they turn into costly breakdowns or safety hazards.
As an ASA supplier, our whole business is built on making parts that are reliable, easy to install, and long-lasting. But even the best ASA in the world won’t perform if it’s installed incorrectly. That’s why we put so much effort into creating clear installation guides, offering technical support to our customers, and including tools like angle gauges with every order. We’ve learned over the years that building a great product is only half the battle; helping our customers install it correctly is the other half.
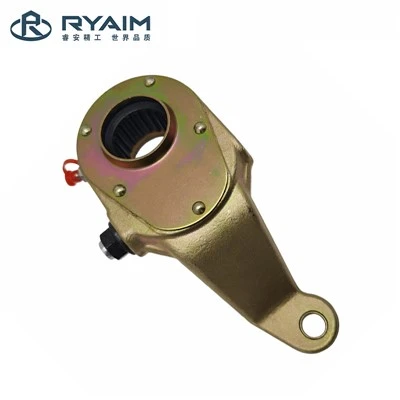
If you’re in the market for Automatic Slack Adjusters, or if you’re dealing with misaligned ASAs that are causing issues for your fleet, we’re here to help. Our team can walk you through proper alignment steps, recommend the right ASA for your specific vehicle models, and provide support any time you have questions about brake system maintenance. We work with fleets of all sizes, from small pickup-and-delivery companies to large long-haul operators, and we’re committed to helping every customer keep their vehicles safe, compliant, and on the road.
Europe Truck Series Automatic Slack Adjuster References
Commercial Vehicle Safety Alliance (CVSA) Brake Safety Guide.
SAE International J267: Automatic Slack Adjusters for Air Brake Systems.
Federal Motor Carrier Safety Administration (FMCSA) Part 393: Brake Systems.
Zhejiang Ryaim Auto Parts
As one of the most professional automatic slack adjuster manufacturers and suppliers in China, we’re featured by quality products and good service. Please feel free to wholesale custom made automatic slack adjuster from our factory. Contact us for more details.
Address: No. 78, Yexiao Road, Yaojiang Town, Zhuji City, Zhejiang Province
E-mail: bd@zjryaim.com
WebSite: https://www.ryaimchina.com/
